While you don’t need to organize your Snaps by group, it’s a handy feature for keeping track of groups of photos, or photos from a single location that you’re making a tour out of! Remember, groups are mainly just for personal organization, you’re able to link any Snap from any group for a tour.
- Use the Navigation Menu to select Groups
- Click the “+” button to create a new Group.
- Once you’ve created the group, head back to the Snaps area using the Navigation Menu
- Click the “Folder” button next to the Group selection tab. This will give you the option to move each Snap into your Group
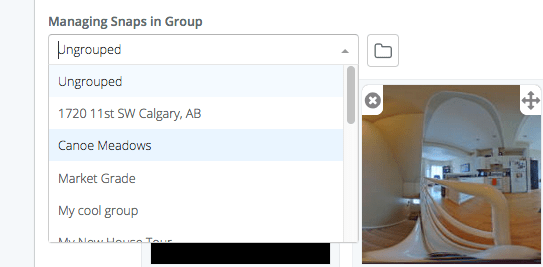
- Using the dropdown boxes that appear under each thumbnail, simply choose the group you want to add the Snap to, and it is moved into that group instantly.
7. From here use the Group navigation drop down to select your created Group and see the Snaps inside of it.

Using Group/Tour Descriptions in Your 360 Photos and Virtual Tours – SeekBeak – Virtual Tour & 360 Image Creator says:
[…] As you can see in the example above, this Snap has a box in the top right corner that can be customized to include any information that you see fit. This is the Group Info Panel and it can be displayed on any Snap within a given Group. If you’re unsure how Groups work, check out our article on them. […]
James Costa says:
I would like to remove it from my snap. How and where do I do this?
Tim Allan says:
Hi James,
If you want to remove a Snap from a group, just follow the instructions above and move your Snap into “Ungrouped”.
Tim Allan says:
If you’d like to turn off the Group Info Panel, simply select “Off” instead of “On” for the “Show Group Info Panel” preference. You can see screenshots on the page you referenced above: https://seekbeak.com/2018/08/24/adding-a-tour-or-group-description/