Hotspots can make or break a virtual tour. They can add much-needed interactivity, information, and excitement to a 360 photo but they can also add visual clutter and distraction if they aren’t implemented correctly. We’ve created this guide for those that are new to using hotspots, and would like to avoid some of the most common mistakes. We’ve used the SeekBeak hotspots engine for our examples, but these tips should work for most platforms.
Can users see the text or icon given its background?
One of the most common mistakes we see in virtual tours on any platform is that hotspots can sometimes get lost in the background due to colour or brightness conflicts. If your text and/or icon is white, and the background is also a bright colour, it can be very hard for users to see. There are a few ways to combat this:
Change the Text or Icon Colour
One of the easiest ways to fix this problem is to simply change the colour of your text and icons to fit with the photo. If you open up your hotspot editor in SeekBeak, you can change the colour to anything you want or add or remove your background.

Add A Background To Your Text Or Icon
We often recommend that people remove the background as a default, and add it back in only if you need to. Keeping a little transperancy is a great way to blend the background and image as well.

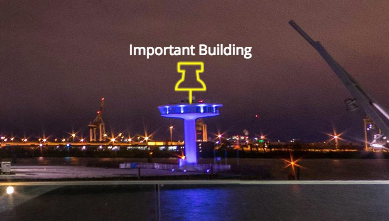
Change the Position of the Text To Be on A Darker Part of the Image
We’ve also added a small amount of black background which is mostly transparent to give that shadow effect.

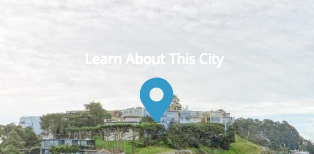
Eliminate the Text Entirely and Pick an Intuitive Icon

There are lots of ways to fix this problem. Get creative with your colours, positions, and icons and users will thank you!
Does your icon make sense? Users should be able to know what they are clicking on before they click!
In user experience design, the concept of “intuitive design” plays a big role. For most situations, users should be able to navigate a website, app, or piece of software without having to consult a manual or ask a question. Correct icon usage plays a big roll in this. Over time, there are some icon standards that have been taken up by everyone in the industry to mean the same thing. For example, the gear icon (⚙ or similar variations) almost always means “Settings.” The mail icon ( ✉ ) almost always means email or contact us.
Similarly, when you are making your hotspots, you’ll want your icons to be intuitive and complimentary with the content that you are presenting. We’ve set the defaults for each hotspot type to be logical and intuitive, but that’s just the starting point. Another consideration is if you don’t want you icon to have label text, then the icon has to convey a lot of meaning by itself. Here are a few examples of fun icon uses with intuitive meaning.

Creatively using icons to intrigue and communicate information is a great way to delight your users and keep the pace of the virtual tour flowing.
Use custom icons to expand your creative potential
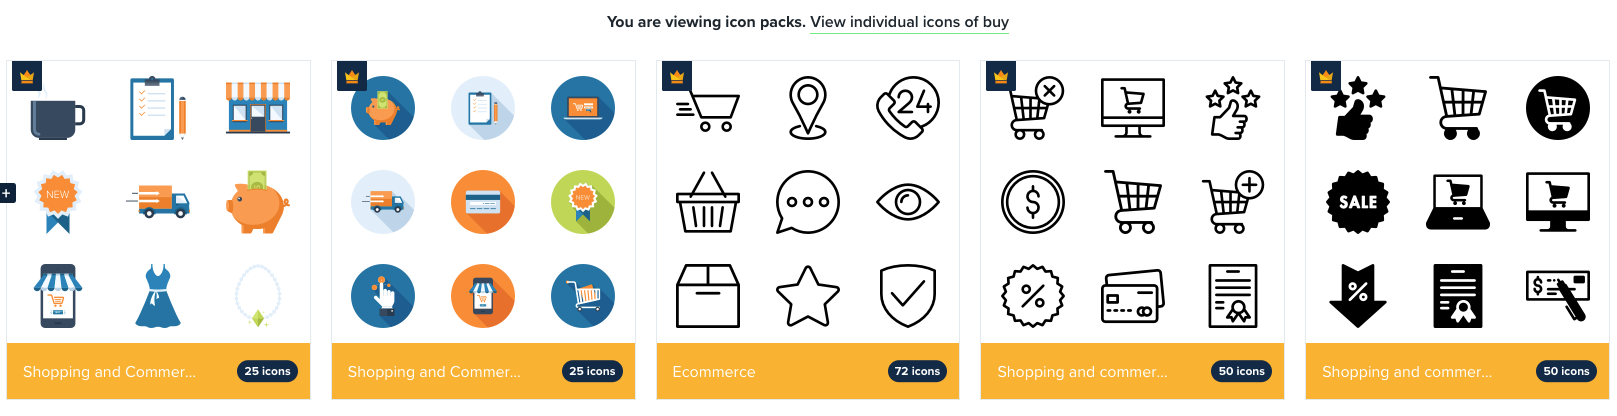
While the default icons are great for most things, you can really create an impact by uploading your own icons for special circumstances or uses. Many of our users will upload a special icon version of their logo. Another thing we’ve seen is users buying icon packages from designers or 3rd-party websites and uploading them into their account for use. It’s a great way to expand your creative options and increase the flexibility of your hotspots.
Remember, your icons need to be in SVG format for them to work. This is because SVG icons are vector based, and dynamically scale perfectly with the size of the screen, so no matter what device, your hotspots and icons will look great.
Always check how your hotspots look on a mobile phone
It’s not uncommon for 60-70% of a 360 photo’s traffic to come from mobile phones or tablets. As the world gets more reliant on mobile devices, it’s important that you consider how hotspots look on mobile phones. As a screen gets resized, so do our icons, but if you cluster too many icons close together, problems can arise. Always make sure you’re spacing out your hotspots so they work on mobile screens.
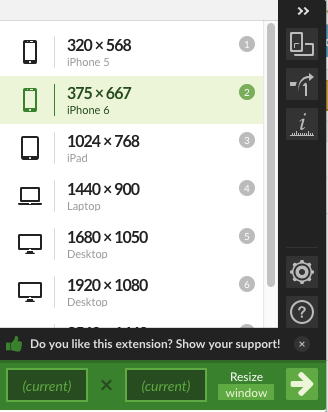
If you’re using a desktop computer to make a tour, we recommend the Chrome browser add-on “Window Resizer” to help you see how your content looks on different sized screens. With just a click of the button, it’ll resize your window to the correct size for the most common types of phone, computer, and tablet.
If you’re using your phone to make a tour (our tour builder is fully mobile compatible) then you’ll already in a great place to check to see how it looks!
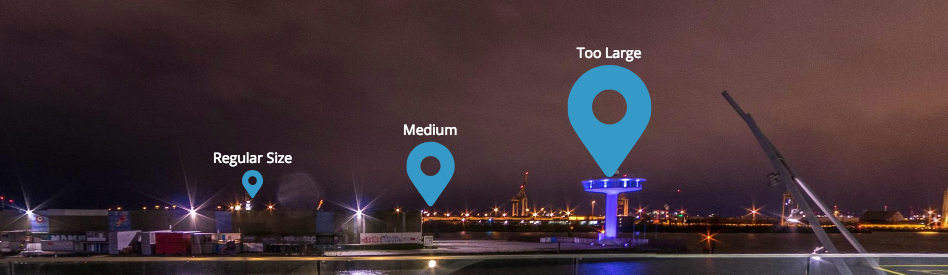
Size matters! Find a balance between too big and too small
Changing your icon size can be a great way to draw more attention to your hotspot, but sometimes going too big can ruin the composition of your photo. Make sure to use icon scale with caution, as massive icons take up a ton of mobile screen room.
Likewise, if you’re using a custom icon with a lot of detail, making it too small will mean the icon becomes unreadable. Make sure you adjust it accordingly depending on your usage.
Reuse & recycle: Save icons and hotspots that you’ll use more than once
If you know you’re going to add a link to your company website on every virtual tour that you make, you can save a lot of time by saving your hotspots for use later! You can create a library of often-used hotspots to really increase your efficiency when it comes to tour creation. Learn more about the icon library here.
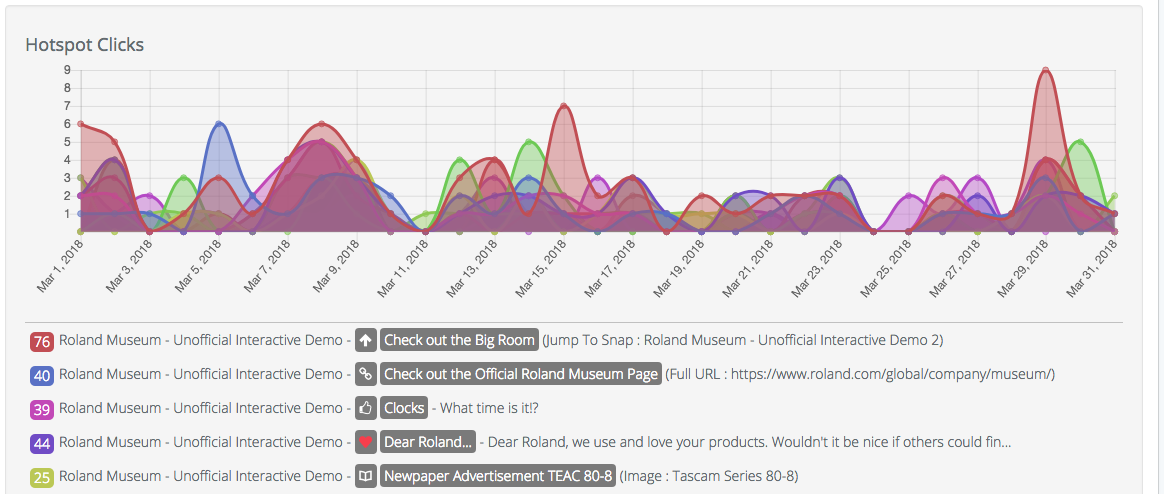
Look at the data: use the Hotspot Report
One of SeekBeak’s unique features is the ability to see how often each hotspot is clicked in your image. These Hotspot reports are a great way to see if people are interacting with hotspots or if the 360 image is driving calls or visits to your website. You can find the Hotspot Report in the Reporting section of the Dashboard.
Want to give our hotspots and 360 photo platform a try? Sign-up for a free-account today or give our premium plans a try.
