We created this guide with Real Estate agents in mind, but the steps work just as well for anyone who is looking to create a virtual tour!
Things You’ll Need:
- Some 360° or panorama photos of the space you want to show
- A SeekBeak Account (free up to 3 photos!)
- Any information that you want to share with your viewers
Step 1: Upload Your Photos Into SeekBeak
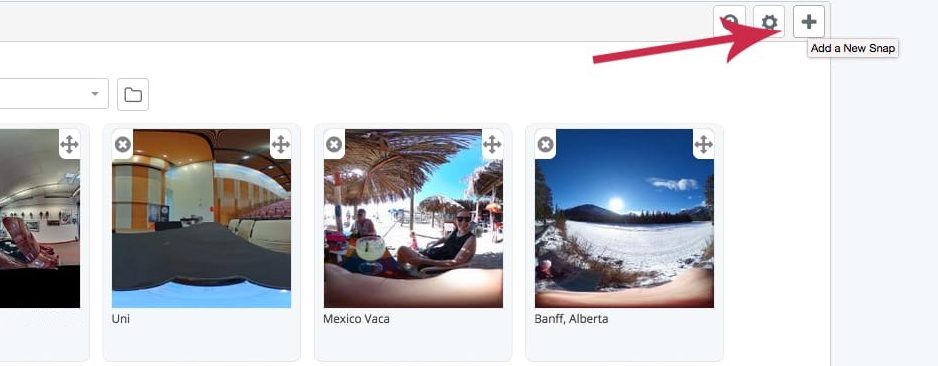
Once you sign into SeekBeak, you can add new photos (called Snaps) by clicking the “plus” button in the right corner of the screen.
From here, you’ll be given the option to upload a single photo or multiple photos. Here’s what it looks like when you upload multiple images. In this case we dragged 5 photos of the house we want to display into SeekBeak. You can see we have the option to name and describe each photo, which is very useful for letting viewers know a bit about the rooms they’re looking at.
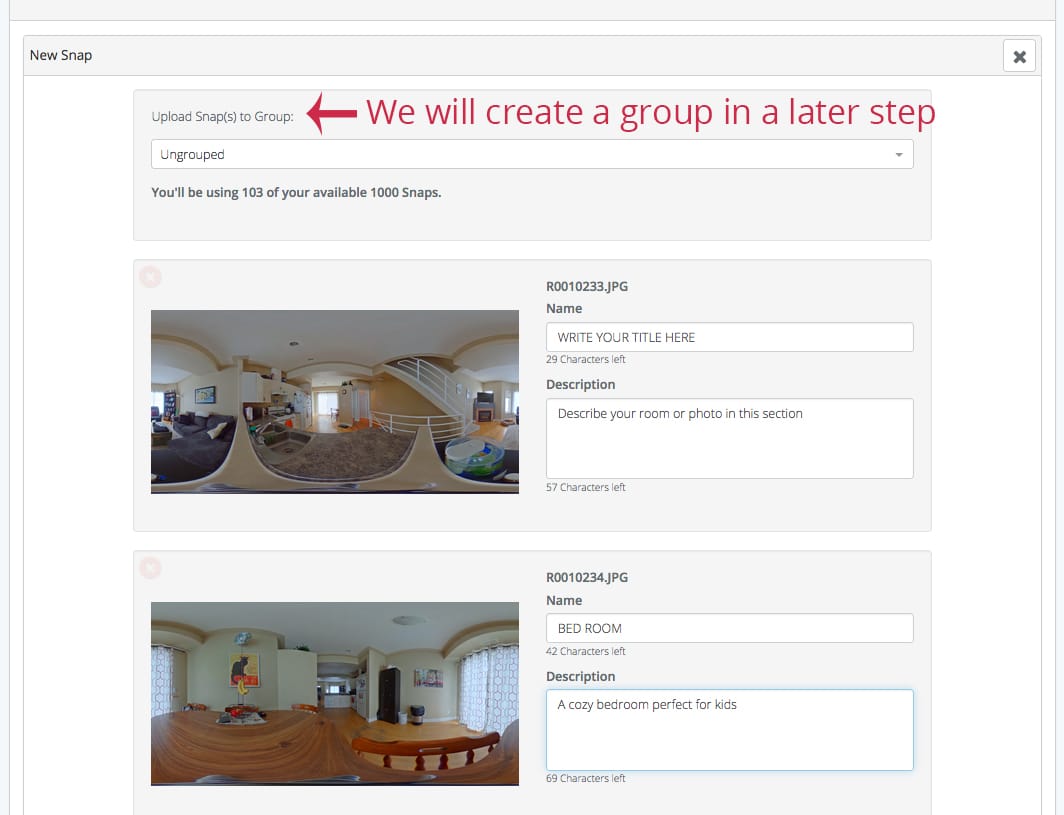
Once you’re finished writing your room titles and descriptions, click upload and SeekBeak will load your images into our hosting platform.
Step 2 – Link Photos Together With A Hotspot
Click a Snap and you’ll enter the viewer mode of SeekBeak.
In the bottom navigation bar, click Edit to enter edit mode, and start adding hotspots. Add a hotspot wherever you’d like.
In the hotspot menu look for the “Type” icon. ![]() You’re going to turn this hotspot into a link to another Snap.
You’re going to turn this hotspot into a link to another Snap.
Click this Icon to open up the “Jump to Snap Menu” 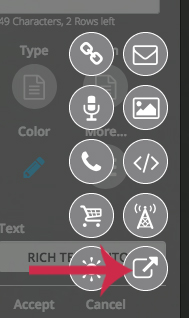
In this section, you’ll be able to select the Group and Snap from which to jump to 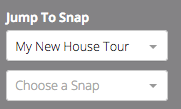
After you’ve selected the Snap, close the editor and save your changes using the bottom menu. Your photos are now linked together!
Here’s a demonstration:
Step 3 – Edit the Text, Icon, Colour, and More!
One of SeekBeak’s unique features is customizing each hotspot! You can customize icons, text, colours, animation, and more.
 To change the icon, click this button and you’ll be able to choose from a wide variety of in-built icons. If you’d like to upload your own icons, you can do that by selecting Icons from the top left drop-down menu in the Dashboard.
 To change the colour of the icon, click this option. You’ll be able to change the text, icon, and background to suit your style. We recommend you experiment with many options to find out what you like the most!
BONUS STEP: Put your Snaps in a Group
While you don’t need to organize your Snaps by group, it’s a handy feature for keeping track of each address or location that you’re making a tour out of! Remember, groups are mainly just for organization, you’re able to link any Snap from any group for a tour.
- Click the drop-down menu in the top left corner of the Dashboard and select Groups
- Open the Add Groups Tab and Input Your Title
- Once you’ve created the group, head back to the Snaps area using the drop-down menu
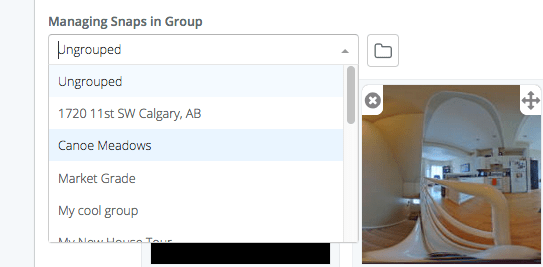
- Click the “Folder” button next to the Group selection tab. This will give you the option to move each Snap into your Group
- Using the dropdown boxes that appear under each thumbnail, simply choose the group you want to add the Snap to, and it is moved into that group instantly.
7. From here use the Group navigation drop-down to select your created Group and see the Snaps inside of it.
Bonus Step #2: Add A Map / Floor Plan (Paid Accounts Only)
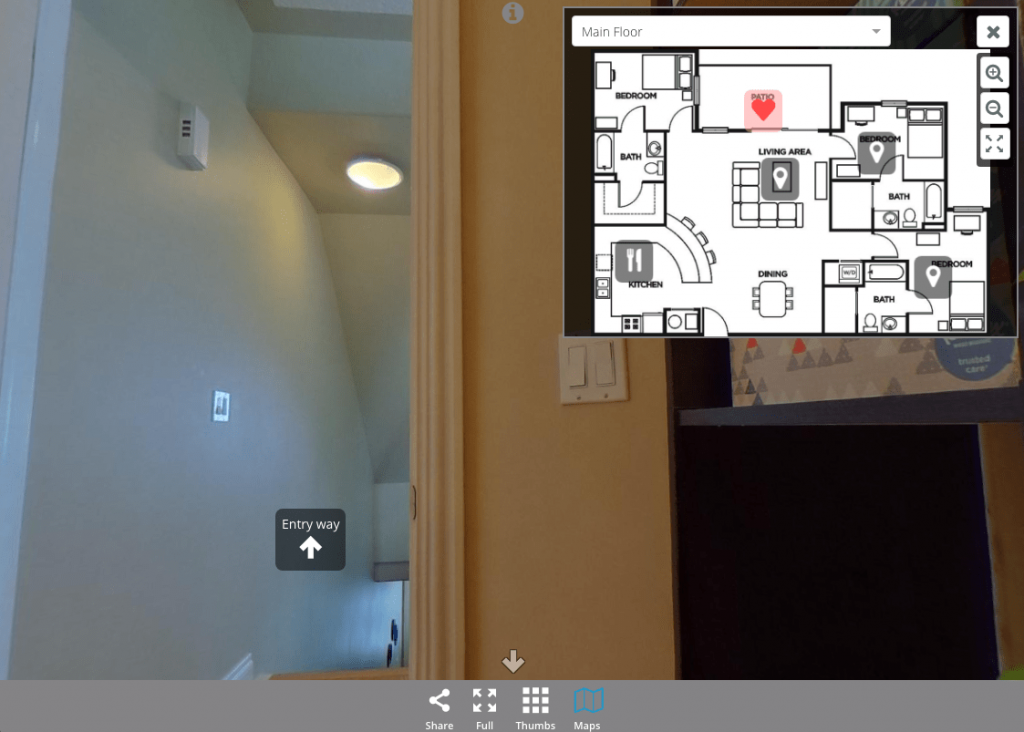
Did you know you can add floor plans, or other 2d images to help people navigate through your tour? We call them Maps and they are easy to add to your tours. Viewers can use it to help understand where they are in the house or how the layout between floors changes.
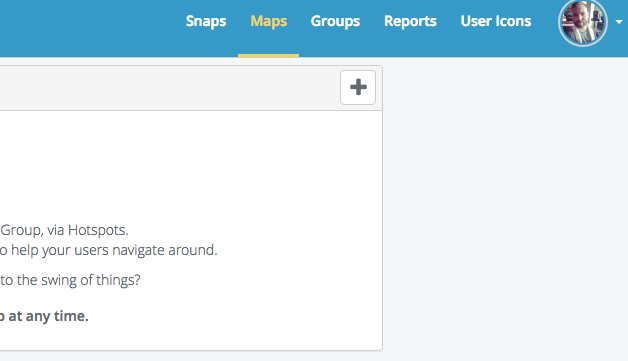
To add a Map to a Group of Snaps, select the Map option in the top left drop-down in the Dashboard.
From here, you can upload a Map just like you would a photo. This Map will now automatically appear in the menu options for all Snaps in the Group.
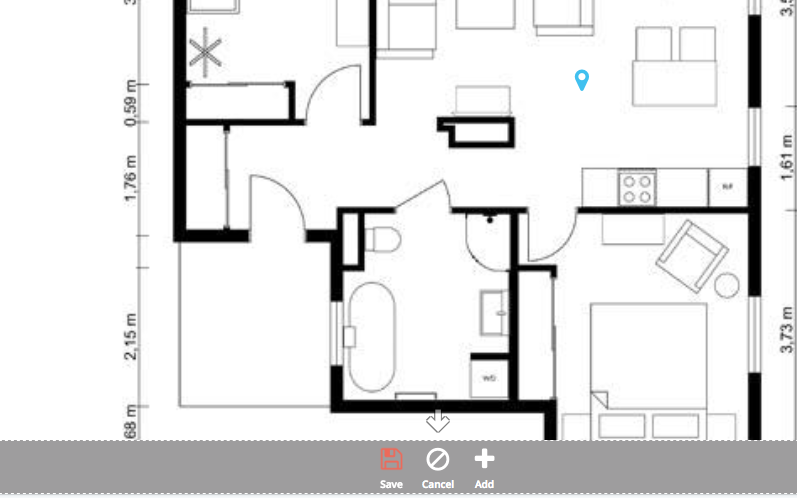
You can even take things further by adding hotspots to the map itself so that users can jump around the house using the map, rather than the hotspots.
Don’t forget that you can add multiple maps to cover different floors, locations etc. Your viewers will be able to select the different Maps while viewing your Snap.

Ben Yates says:
Andrew I want to know more about how you host on a white label version? For example, our clients may already have a custom URL or we may want to create one?
Andrew says:
Hi Ben,
Custom URL branding is a new feature we’re happy to offer! White Label options are available in our Plus and Enterprise plans. We’d be happy to help you out with any questions you have about it if you contact us at [email protected]
Cheers
Andrew
Martin says:
Can you make groups private so I can allow my v.a. Limited access?
Tim Allan says:
Sure Martin, you can add a password, or set allowed referrers per group… or both!
Akshay says:
Seekbeak has nailed it with this fantastic blog on “How to Create a Virtual Tour for Real Estate”! The article provides a comprehensive and user-friendly guide, making it easy for real estate professionals to craft captivating virtual tours. The step-by-step instructions and insightful tips ensure a seamless experience from start to finish. Thanks to Seekbeak, realtors like me can now showcase properties in a more engaging and immersive way, attracting potential buyers and elevating our marketing game!